
Why Resin Coasters Are Perfect for Beginners
Resin coasters are a favorite among DIY enthusiasts for several reasons:
- Manageable size: Small projects are easier to handle than large furniture pieces.
- Creative flexibility: You can experiment with colors, glitters, and inclusions like dried flowers or beads.
- Quick gratification: Coasters cure faster than larger resin projects, so you see results quickly.
Using high-quality resin craft supplies ensures your coasters are durable, glossy, and professionally finished.
Step 1 – Gather Your Resin Craft Supplies
Before starting, make sure you have all the necessary materials:
- Epoxy resin and hardener (2-part)
- Silicone coaster molds
- Measuring cups and stir sticks
- Gloves and protective surface covering
- Pigments, mica powders, or alcohol inks
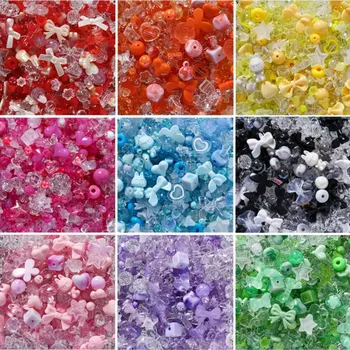
- Optional inclusions: dried flowers, glitter, or small charms
Tip: Investing in quality resin craft supplies will prevent sticky finishes, yellowing, or uneven curing.
Step 2 – Prepare Your Workspace
A clean, organized workspace makes a big difference in resin projects.
- Cover your surface with disposable sheets or parchment paper.
- Ensure proper ventilation.
- Keep all your supplies within reach to avoid interruptions.
Pro tip: Place your molds on a level surface to ensure the resin spreads evenly during curing.
Step 3 – Mix Your Resin and Hardener
Mixing is a critical step. Even small inaccuracies can affect curing.
- Measure the resin and hardener according to the manufacturer instructions (usually 1:1 or 2:1 ratio).
- Stir slowly for 2–3 minutes, scraping the sides and bottom of the container to fully combine.
- Avoid vigorous stirring, which can introduce bubbles.
Tip: Use a small torch or heat gun to gently remove surface bubbles after pouring.
Step 4 – Add Color and Effects
Now comes the fun part—customizing your coasters:
- Add mica powders, alcohol inks, or pigments to the resin mixture.
- Layer colors for a marbled effect, or pour clear resin over dried flowers for an elegant touch.
- Sprinkle glitter for a sparkling finish.
Example: Trendy coasters often feature ocean-inspired designs using blue and turquoise pigments layered with white streaks to mimic waves.
Step 5 – Pour Resin Into Molds
- Pour slowly to avoid bubbles.
- Tilt and rotate molds gently to help the resin spread evenly.
- Allow a few minutes for bubbles to rise, then remove them with a heat gun.
Tip: For layered designs, wait until the first layer is partially cured before adding additional colors or inclusions.
Step 6 – Cure and Finish
- Allow the resin to cure according to the manufacturer’s instructions (typically 24–48 hours).
- Once cured, remove the coasters from the molds carefully.
- Sand rough edges with fine-grit sandpaper and polish if desired.
Pro tip: A glossy finish is achievable by applying a thin top coat of resin or using a resin polish.
Bonus Tips for Stunning Coasters
- Experiment with inclusions: Small beads, pressed flowers, and metallic flakes create unique effects.
- Keep notes: Record your resin ratios, pigments, and curing times for consistent results.
- Gift or sell: Handmade resin coasters are popular for home décor and as personalized gifts.
Creating resin coasters is a fun, creative way to explore the world of resin crafts. With the right resin craft supplies, careful preparation, and patience, even beginners can produce professional-looking, stunning pieces.
Start your resin coaster project today, experiment with colors and inclusions, and watch your DIY creations come to life. For more beginner-friendly projects and tips, join our newsletter and stay inspired with the latest in resin crafting.

0 Comments